Sunday, September 29 is National Coffee Day and if you know me you know I just don't love coffee but I live on it. After having my daughter I definitely stepped up to two cups a day! I sleep less these days not because of my daughter because girlfriend sleeps a solid 13 hours a night but because work is crazy hectic and there just don't seem to be enough hours in the day to make a zillion crafts, answer a billion emails and spend quality time with Lily and Brennan. Even though I hit up the Starbucks drive-through on the way to work everyday I still have 5 different types of coffee makers at home for the weekends and of course, we have one at the studio. At home, I have a Nespresso, Keurig, Cold Drip, French Press and Grinder/Maker.
Along with coffee comes coffee mugs. I have always loved collecting and decorating coffee mugs. It is a fun way to add a little extra smile to your cup of joe! To celebrate National Coffee Day I am sharing 8 easy ways you can decorate coffee mugs!
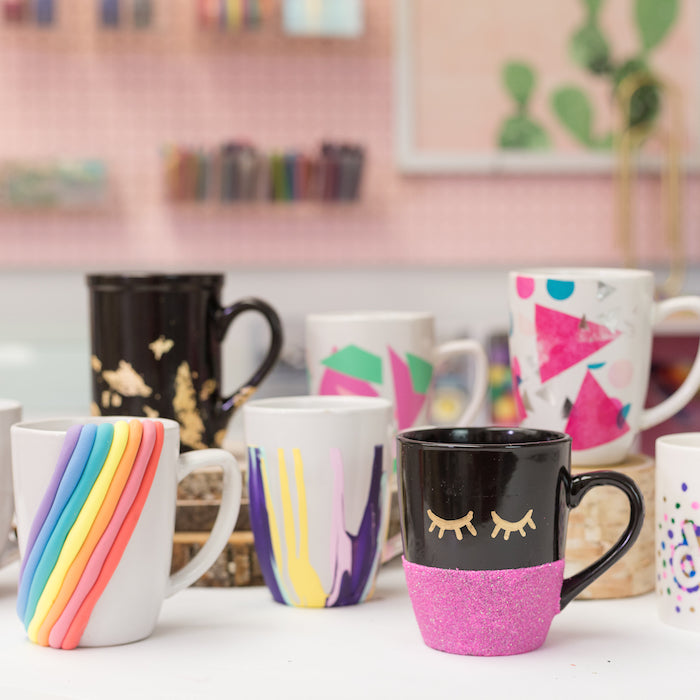
News Flash!!! Check out the segment where I shared these fun mugs on Hallmark Home & Family for National Coffee Day!


1. Excess Adhesive Vinyl: Cut up your scraps of permanent adhesive vinyl, peel the backing and stick on your mug!

Glitter Block: Use painters tape to tape off the bottom section of the mug and coat with a spray adhesive. Pour glitter all over. Let it sit for a few minutes and repeat until you have the desired coat. Remove painters tape. Let the glitter sit overnight. Add a coat of dishwasher safe Mod Podge and add eyelashes with a permanent paint pen. Let the mug cure for a few days before using.

Gold Leaf: Using a paintbrush and Mod Podge add streaks of Mod Podge around the from the bottom to halfway up the mug (stay away from the rim). Next, use your fingers or a clean brush to sprinkle on gold leaf. Use the clean brush or your finger to tap it on the mug. Let it sit for a minute and then use a foam brush to brush away the excess gold flakes. Let it dry for a few hours. Handwash!


3D Rainbow: Using Sculpey oven bake clay, pick your favorite rainbow of colors and roll them into thin rolls. Line them up, slightly pushing them together. Lay the row of colors on the mug and trim the ends. Bake in a home oven according to the directions on the Sculpey package.

Marbled with Nail Polish: Fill a disposible bowl with lukewarm water. The bowl needs to be deep enough to submerge 3/4 of the mug. Pour multiple colors of nail polish on the surface of the water. Use a stir stick to quickly marble the colors. Dip the mug straight down and straight up. Do not wipe the water, let it evaporate!

Sharpie & Stickers: Add stickers to the mug to spell out a fun message. Color over and around the stickers with sharpies. Make sure to cover the edges of the stickers. Remove the stickers and tada!

Tissue Paper & Mod Podge: Cut scraps of tissue paper. Brush Mod Podge on the mug and add tissue paper. Apply mod podge on top and smooth with your finger. Let it dry for 24 hours. Apply a layer of dishwasher safe Mod Podge.

Paint drip: Using painters tape off the top of the mug. Turn the mug upside down and place on a piece of parchment paper. Pick your favorite colors of acrylic paint and pour on the bottom of the mug and let them drip over the edge! Let the paint dry before removing the tape. Apply a coat of Mod Podge.

How do you guys take your coffee? Can you guess how I like mine?
Happy National Coffee Day!
xoxo- LL