This is a sponsored conversation written by me on behalf of Cricut. The opinions and text are all mine.
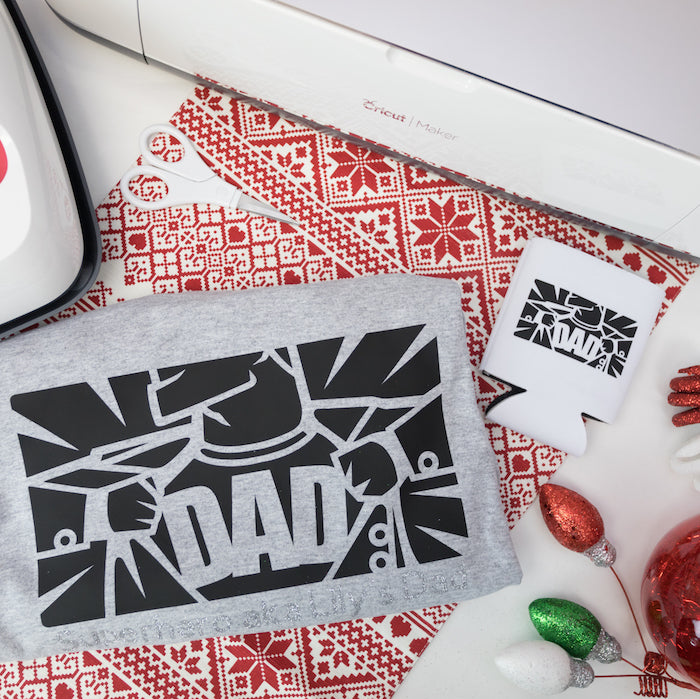
The holidays are here and I am in full crafting mode prepping all my gifts. I have partnered with Cricut to share an easy personalized gift for my husband. My husband loves personalized dad t-shirts so when I found the superhero dad card project in Cricut Design Space I knew he would love it as a t-shirt.
In order to turn this design into an iron-on cut file I could use on a t-shirt I used the contour tool in the bottom right corner of the screen to remove the top card flap and just leave the design.


Now that we got the base of the file ready, let's get crafting!
Here is what you need:
- Cricut Maker® Machine,
- Cricut EasyPress 2, 9" x 9"
- Cricut EasyPress Mat, 12" x 12"
- Cricut Everday Iron-On in Black
-
T-shirt
-
Koozie
-
Cricut Weeding Tool

You can create this project with either the Cricut Explore Air 2 or the Cricut Maker. My Cricut Maker is my go-to tool for making quick and easy projects and gifts. The Maker handles fabrics, leather, paper, and balsa wood with effortless precision. Cuts sewing patterns in just a few clicks. And places more creative possibilities than ever at your fingertips. It is the ultimate cutting machine!
You can access my design file already formated for an iron-on project. You can edit the text as you see fit!
Directions:
- Prep the file in Cricut Design Space. You can use the file I already contoured for an iron-on project here. I added a personalized message that says "Superhero aka Lily's Dad". I also have a smaller version of the superhero design sized for a koozie.

- Once you are happy with the design select Make It.
- Make sure to turn the Mirror on before cutting.

- When ready to cut the text select glitter iron-on.

- When ready to cut the design select everyday iron-on setting.

- Once all the files are cut carefully pull back the negative space vinyl. Use the weeding tool to remove the excess vinyl.


- Visit the Cricut EasyPress Heat Guide to get the correct heat settings and instructions for pressing the projects.
- I started with the t-shirt. The guide told me to set my EasyPress 2 at 315 degrees and press for 30 seconds for the Everyday Vinyl on a 100% cotton t-shirt. The guide gives very specific instructions. Place the EasyPress mat inside the t-shirt.


- I switched the inputs for the glitter iron-on and the guide told me to press at 330 degrees for 30 seconds on a 100% cotton surface.

- For the koozie I select the Everyday Iron-on with a polyester surface and the guide instructed me to press at 315 degrees for 30 seconds. Make sure to place the koozie on the EasyPress mat.


TADA! In under 30 minutes I have a personalized gift for my husband for the holidays. This one will be from our daughter and I know he is going to love it!


Stay tuned! My next post will be a round-up of 25 easy personalized gifts that you can make with your Cricut!
Follow Cricut on facebook and instagram for more creative projects!
Looking for more Cricut crafts? Check out Cricut Trick or Treat Totes, Cricut Back to School Backpack, Cricut Easypress Nursery Pillow, Cricut Canvas Pumpkin Artwork, Infusible Ink 101.
Want to learn more about the Cricut Maker? Check out 5 Reasons Why I love my Cricut Maker.
xoxo- Lynn