It’s officially back to school time, which means hitting up your local store to grab all new and fresh school supplies. When I was a kid, this was my favorite time leading up to the start of school. There’s nothing better than fresh new school supplies. Even as an adult, I still get giddy over new office supplies–some things never change!
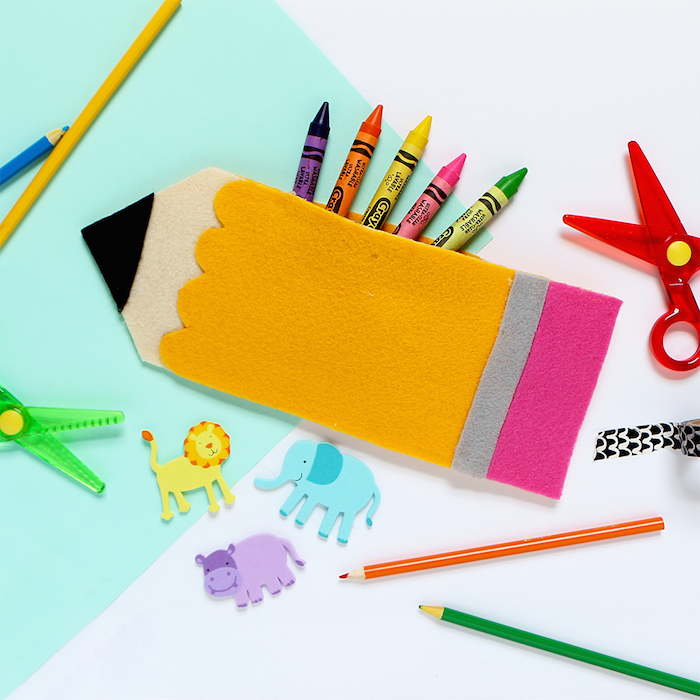
Instead of just going with the standard plastic pencil case that everyone manages to pick-up while grabbing school supplies, I thought it would be fun to make my own out of felt! This no-sew DIY felt pencil pouch is the perfect accessory for back to school (I mean, it is a pencil after all!). Since this pencil pouch doesn’t require any sewing, anyone can make it. Check out the full tutorial below to see how you can create your own DIY Felt Pencil Pouch!
Supplies:
- Felt (Cream, Black, Yellow, Gray, and Pink)
- 5”x11” Paper
- Pencil/Pen
- Scissors
- Velcro
- Hot Glue Gun and Glue

Directions:
- To create the pencil template, fold a piece of 8.5”x11” paper in half lengthwise. Then, find the middle and fold the corners in to create a point.

- Trace the pencil template on top of the yellow felt twice and cut.

- Trace the pencil template on the cream felt and cut.
- Cut the tip-off of the pencil template, trace it on the black felt, and cut it out.


- Cut the triangle section off of one of the yellow pieces of felt.

- Then, draw scallops towards the top of the yellow felt and cut it out. This will create the pencil part of the pouch.

- Cut a small rectangle piece out of the gray felt the width of the pencil shape and ¾” long.

- Cut a piece of pink felt the width of the pencil shape and 1.5” wide for the eraser.

- Glue the black felt to the tip of the cream felt and then glue the scalloped yellow felt on top.

- Glue the pink felt to the other end of the pencil and glue the gray felt below it.

- Flip the finished pencil shape over, add glue to the back of the Velcro, and glue it to the top center. Flip over the other yellow piece of felt and glue Velcro in the same spot.

- Add hot glue about ¾” from the Velcro along the edge. Keep adding glue around the rest of the pouch and stop when you are ¾” away from the other end of the Velcro.
- Glue the yellow piece of felt to the back with the Velcro on the inside.


Now that you’re finished with your DIY felt pencil pouch, all you need to do is fill it up with all of your new favorite school supplies!
- Meghan Quinones
Meghan Quinones is a Craft Box Girls contributor as well as a blogger, content creator and author of her blog Happiness is Creating!