This post is in collaboration with the DIYZ app®. All opinions of apps and companies that help me complete DIY Projects are my own.
Every year when spring rolls around I get the itch to redecorate and get creative by completing home improvement projects. It just so happens this urge comes just in time for National DIY Day on April 2! I recently discovered the DIYZ app®, which offers a library of projects for all skill levels with step-by-step guides and segmented videos to help you tackle home improvement projects with confidence. We are so excited to partner with the DIYZ app to celebrate National DIY Day with our favorite do-it-yourself projects.
For beginners, the DIYZ app makes building shelves easy with step-by-step segmented videos. This was the first time I ever tackled building shelves and it was so easy with the instructional videos! If you are new to building shelves or do-it-yourself projects in general, DIYZ allows you to shop for the tools and materials needed without ever leaving the app – and you can speak directly with a licensed contractor at the tap of a finger via phone or video-chat. Building shelves have never been easier!

Time to start building shelves!
Project Time: 4 hours
Difficulty Level: Intermediate
Materials:
- Miter Saw
- Table or Circular saw
- Cordless drill/Driver
- Sander and/or Sand paper
- Stud finder
- Screwdriver
- Level
- Clamps
- Paint brush/Rag
- Eye protection
- Ear protection
- Mask
- Gloves
- Pin nailer (optional)
- Compressor (optional)
- Plywood
- Wood glue
- Wood screws
- Stain
Directions:
- Determine the pieces of wood you need. I have laid out a visual cut list below. To change the size of the shelf, adjust all relevant measurements.
- Prior to making any cuts, create a cut list. Remember, accurate measurements are essential for all woodworking projects, including building shelves, so as the old expression goes, measure twice and cut once!
- Front - ½” x 2 ½ “ x 24”
- Sides (2) - ½“ x 2 ½” x 6 ½”
- Bottom - ½” x 5 ½” x 23”
- Top - ¾” x 6 ¾” x 25 ½”
- Ledger - 1” x 2” x 23”
- Ledger Brackets (3) - 1” x2” x 4 ¾”

- Use a table saw to cut the widest pieces first.
- Use a miter saw to cut 45 degree joints on one end of the 2 smaller side panels, as well as both ends of the front side panel. When assembled, these will fit tightly together in front of the shelf.

- Using a miter saw, cut your 1x3 for the mounting ledger and brackets. You’ll need one piece that’s 23 inches long and three 4 ¾ inch pieces. A tight, firm fit is essential, so be sure to measure twice before you cut.
- Dry fit the pieces together to ensure a secure fit. A little extra cutting or sanding may be needed.
- I cut an ornamental edge on my top piece with my table saw. This is completely optional.

- Sand wood with a low grit sandpaper to remove any imperfections.
- After sanding, use a rag or brush to stain or paint the shelf pieces.
- Using clamps for a tight fit, fasten the front and sides to the bottom of the shelf with wood glue, wipe away excess with a damp cloth or sponge. You can use a pin nailer to secure shelf instead of, or in addition to, the glue.


- Align the 3 short ledger pieces along the longer piece. With a drill driver, pre-drill 2 holes in each bracket from the back of the long ledger. Attach with screws, making sure each screw head sinks below in the wood.


Hanging Your Shelf
- Mark where you’d like to hang your shelf with a pencil and tape measure.

- Then use a stud finder to mark your wall studs.
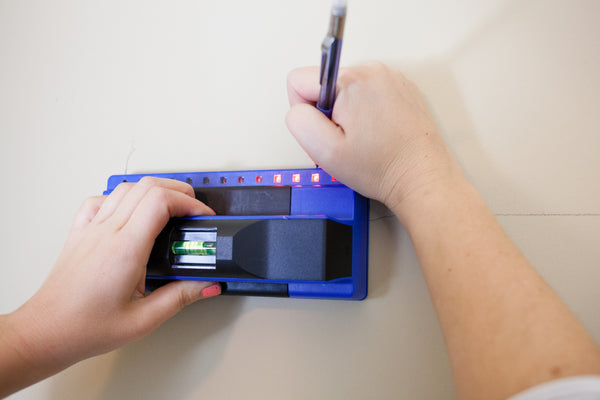
- Hold ledger up to the wall with a level on top to ensure your placement is aligned.

- Drive 2 long screws per stud through the ledger.


- Slide your shelf over the ledger and press it firmly to the wall. Drive the screws through the shelf and into the ledger with a screwdriver. Once you’ve secured the final screw your build is complete.


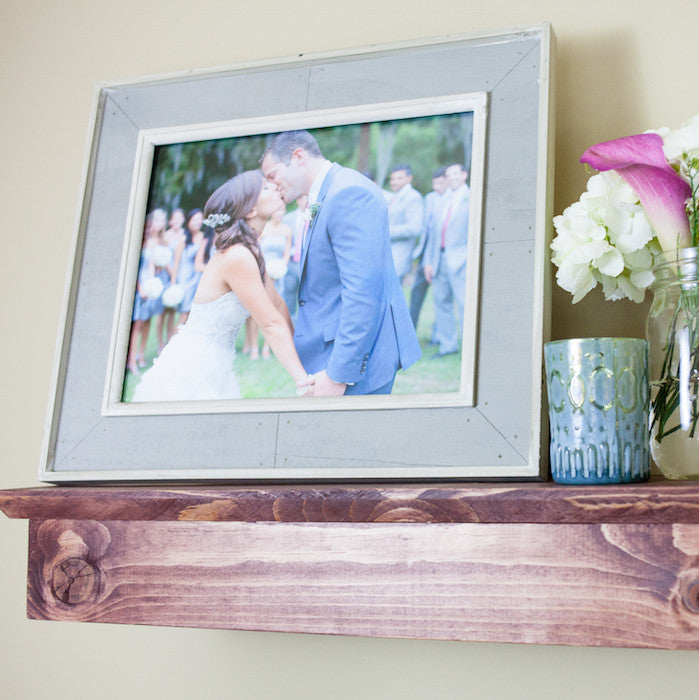
Now it’s time for my favorite part of building shelves--decorating! Style your shelf with your favorite photographs, candles, and fresh flowers!

Don’t forget – if you have any questions or need advice when you are building shelves, you can chat with a licensed contractor without leaving the app. With the tap of a finger, you can get answers via phone or video-chat.
Remember, National DIY Day is right around the corner on Sunday, April 2. Download the DIYZ app for free now. The app is available from the Apple App Store for iPhone or Google Play for Android and includes lots more project ideas to celebrate! Don’t forget to share your projects with us using the hashtag #NationalDIYDay.
Connect with DIYZ: Facebook | Instagram | Twitter | Pinterest | Blog | #DIYZ #GetWise
xoxo- LL

