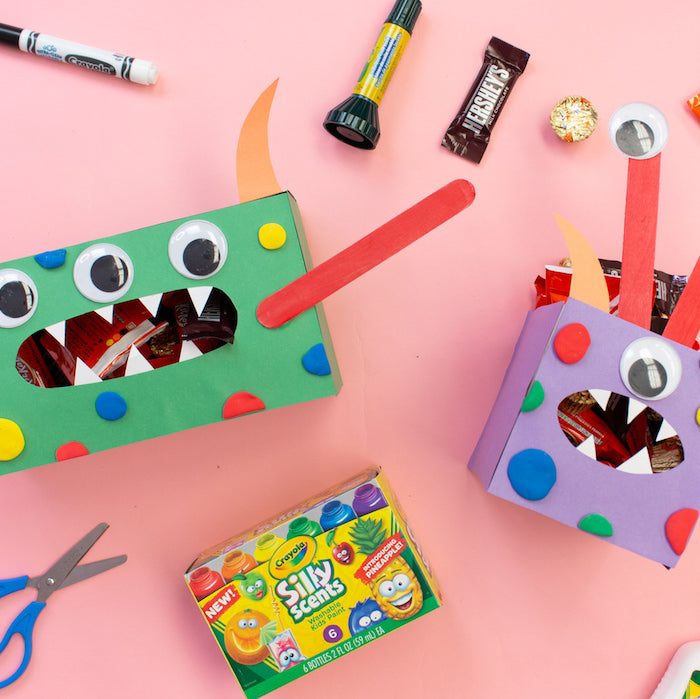
It's monster bash!!! Tricks and treats are what these monsters love to eat! Today we are turning a tissue box into a monster treat box.
Project: Tissue Box Monster Treat Box
Difficulty: Intermediate (this will require a little help from an adult)
Materials from Kit:
- Silly Scents Washable Paint
- Model Magic
- Construction Paper
Additional Materials:
- Square or Rectangular Tissue Box
- Scissors
- 2 Popsicle Sticks
- Paint Brush
- Glue
- Googley Eyes

Project Video:
CLICK HERE to watch the video on YouTube with captions.
Directions:
- Pick a color of Silly Scents paint and paint the 2 popsicle sticks. Set aside to dry.

- If you are using a rectangular box, trace the small sides of the boxes on construction paper. Trace the opening side of the box on the same color construction paper. Trace the top of the box on the same color construction. Cut out all the pieces.
- If you are using a square box, trace three of the sides on a color of construction paper and cut out.

- For the square box, glue two pieces of the paper you cut out on each side of the box. Do not glue one over the opening. Have an adult help you open the top of the box and cut off the flaps so the top is completely open. This will be how you put your candy in the box.


- For the rectangular box glue one of the large pieces on the top of the box. Have an adult help pull open one of the small sides of the box and cut off the flaps. Fold one of the small pieces of paper in half and glue on the inside of the box. This is to help keep the candy in the box.


- If you are using a square box, fold the last square piece of paper in half. Use a marker to draw a half oval on the fold side. Cut the the oval out and unfold the paper.

- If you are working on the rectangular box take the last rectangular piece of paper and fold in half hot dog style. Draw half of an oval along the folded side and cut out.

- Next place the piece you cut out on top of a white piece of construction paper and trace the opening. Remove the paper. Draw teeth in the oval you just traced.

- Cut the teeth out and glue them in the opening on the piece of construction paper.


- Glue the piece with teeth over the opening of the tissue box.

- Draw and cut out horns.

- Fold the ends of the horns over and glue to the top of the monster's head so they stand up.

- If you are using the rectangular box glue googley eyes directly above the mouth. If you don't have googley eyes you can draw eyes. Glue the popsicle sticks to the side of the box to make monster arms.


- If you are making a square monster glue one eye above the mouth. Glue the other two to the ends of the popsicle sticks. Glue the sticks to the inside top of the box. If you don't have googley eyes you can draw them on the box and use the popsicle sticks as antennas.


- It's time to make monster spots. Take small pieces of Model Magic and roll them into balls. Press the balls in between each finger. Glue the spots all over the front of the box.


Now all that is left to ask your parents really nicely to fill your monster box with candy!

I can't wait to see your monster treat boxes! Parents, if you are apart of the facebook group please share your child's project so I can see their creativity!