
There is something about a cactus isn’t there? They are weird and wonderful plants, which not only look great, but also are incredible in the way they survive. The cactus trend has been very popular recently, with many companies creating funky and kitsch accessories and interiors based round the cactus. So I was thinking, let’s jump on board and celebrate this wonderful piece of nature too! And as it is National DIY Day soon (April 2nd), this is the perfect project to get your creative juices flowing.
What better way to do this though, than by combining this trend with neon rope – it’s bold, bright and fun! This DIY cactus neon light will look great in your home, plus it is completely customisable to fit your scheme.
You will need:
Green craft wire
Green neon rope
Thin craft wire
Flowerpot
Toy stuffing
Neon pink spray paint
Fabric
Scissors
Glue gun and glue sticks
Wooden block

Directions:
Step 1- To begin, give the flowerpot a wipe so it is clean and dry. Now spray the flowerpot with neon pink spray paint all over. Leave to dry.

Step 2 - Bend the green craft wire into a medium sized cactus shape.

Step 3 - Now with the neon rope light, attach it to the wire cactus with the thin craft wire at intervals following the shape.


Step 4 - To help the wire cactus stand up in the flowerpot, glue a wooden block into the base of the flowerpot.

Step 5 - Cut a strip of fabric, enough to cover the top of the flowerpot.

Step 6 - Now make two small marks with pen on the centre of the fabric to slot the ends of the wire cactus through. Cut the dots with scissors.

Step 7 - Insert the ends of the wire cactus through the cut holes in the fabric.

Step 8 - Add a large amount of hot glue onto the top of the wooden block and glue the ends of the wire cactus onto the block. Let the glue cool.
Tip – At this stage, make sure the neon rope is away from the hot glue otherwise it will damage it.

Step 9 - Add toy stuffing to the inside of the flowerpot, giving the fabric some padding.

Step 10 - To finish, tuck the battery pack and fabric into the rim of the flowerpot, secure at the front with glue if needed.

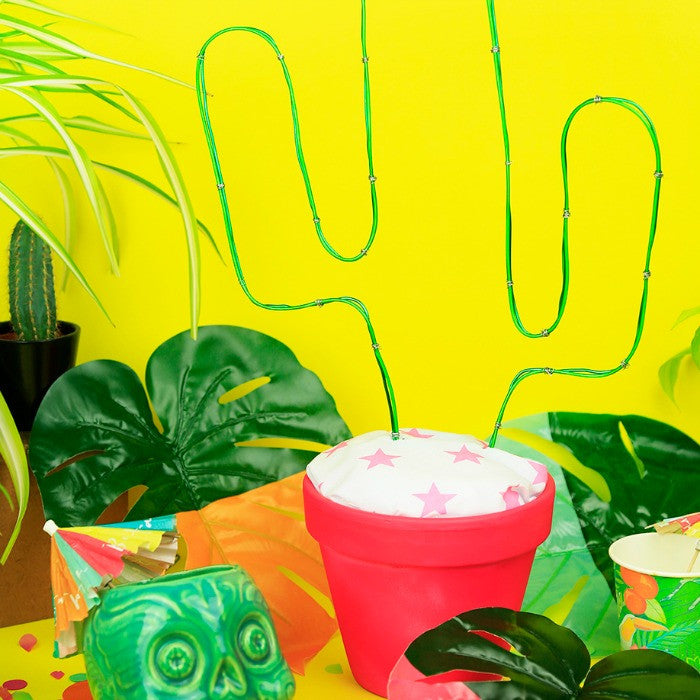
Now switch it on and enjoy your new cactus lamp!

Special thanks to Talking Tables for supplying the styling for the main image, which includes:
*Decadent Decs Pom Pom Garland
Skull cocktail glass by Bespoke Barware
Sophie Prescott
National DIY DAY Ambassador| DIY Blonde
Wivenhoe UK
DiY Blonde is a fresh and funky brand, mixing DIY, Interiors, Craft and Property advice together to give the viewer the opportunity to put their creative input on their homes, but without breaking the bank - which let's face it helps us all! It is my mission to lose the ‘mumsy’ tag on crafting and to encourage a younger generation to ‘make’ before they ‘buy’. With the rise of upcycling and homemade gifting, this has been the perfect time for the DiY Blonde brand to thrive and helping people to create the home of their dreams, but on a budget is so important to me. After working as an Interior Journalist and now as an almost qualified Interior designer, I wanted my own blog to share my creative ideas with the world. I have since become a TV craft expert also, so having diyblonde.com is a great place to display my ideas and tips. I just hope to inspire people to have the home they have always wanted, without any limitations.
Connect with Sophie: Website | Facebook | Twitter | Instagram | Youtube | Email